







 21% THCa
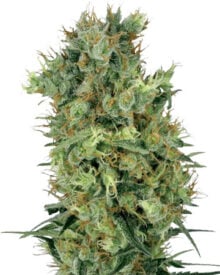

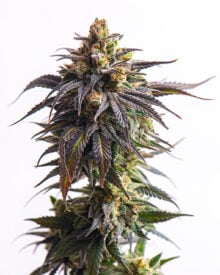
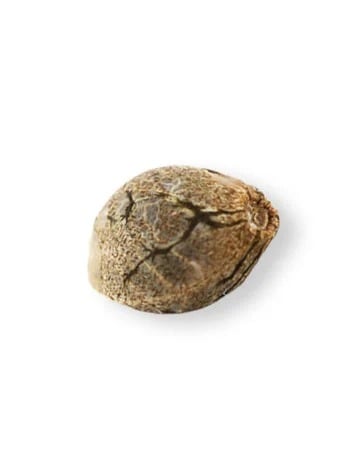
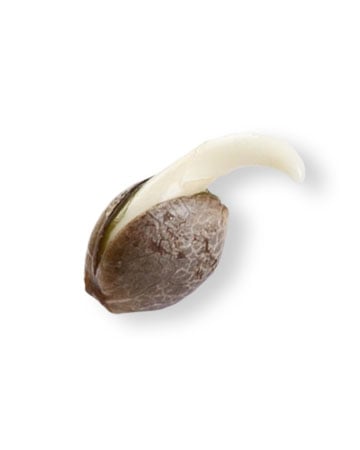
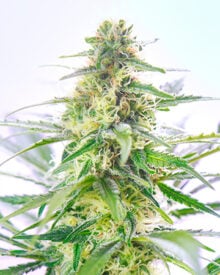
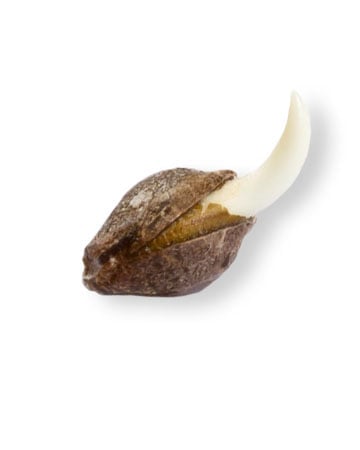
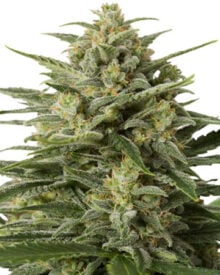
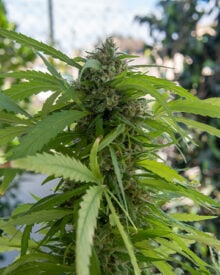
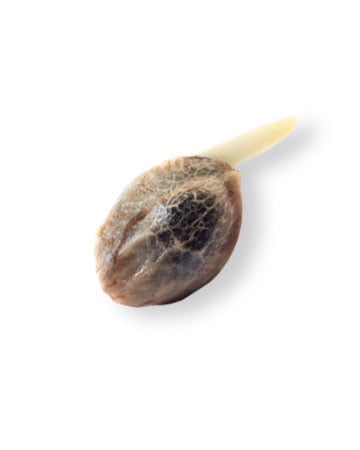
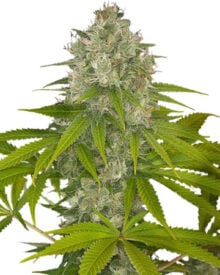

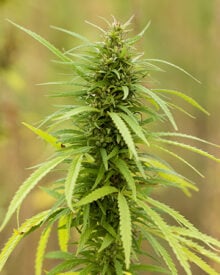
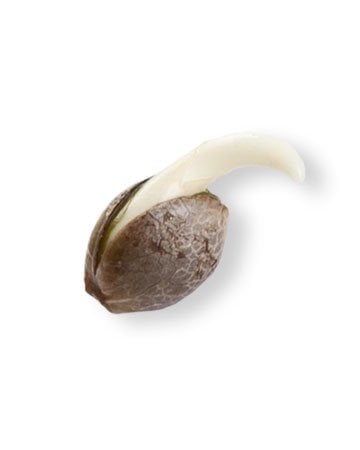
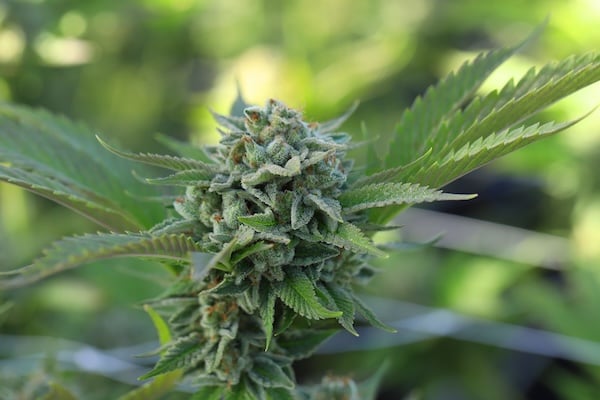
Image credit: Cannafornia
A weed plant goes through four growth stages on its journey from seed to harvest. Knowing what to expect from each is one of the most valuable approaches a new grower can take. It will allow them to cultivate with more confidence, avoid common mistakes, and allow their plants to meet their full potential.
Many photoperiod strains take somewhere in the range of 14–32 weeks to transform from seed to fully mature cannabis plants. While the flowering stage often receives the most attention, it tends to take up just 8-11 weeks of the entire process. For this reason, it can be especially helpful for growers to avoid overemphasizing the bloom phase, especially at the cost of the germination, seedling, and vegetative stages.
This guide covers every step of the growing process, making it easier to know what to do and when. We’ll also cover what comes after the flowering phase, providing useful tips for harvesting, drying, and curing your weed plants.
Weed Plant Stages at a Glance
| Stage | Typical Length (photoperiod) | Typical Length (auto) | Indoor lighting schedule | What the plant does | What the grower does |
| Germination | 1–7 days | 1–7 days | No special light schedule required at this point | The seed absorbs water, opens, and develops a taproot. | Keep the growing medium moist and warm, but not waterlogged. |
| Seedling | 2–3 weeks | 2–3 weeks | 18 hours of light followed by 6 hours of darkness. | The first leaves develop, and the plant begins building its root system. | Keep temperatures between 68°F – 77°F during the day. Carefully water your seedlings as the roots develop. |
| Vegetative | 3–16 weeks | 2–4 weeks | 18 hours of light followed by 6 hours of darkness. Autoflowers do not require a light-schedule change. | The roots, stems, and leaves will continue to grow, producing a sturdy structure to support buds later on. | Maintain temperatures of approximately 70°F – 85°F. Use a vegetative nutrient formula. During the pre-flowering stretch, drop temperatures slightly to 65–80°F during the day. |
| Flowering | 8–11 weeks | Often 6–10 weeks, depending on the cultivar | Maintain a 12:12 light cycle. | Flowers develop and mature, producing resin glands called trichomes. | Maintain daytime temperatures of approximately 65°F – 80°F, dropping to 60°F – 70°F at night. Monitor flower development, maintain suitable conditions, and check trichomes as harvest approaches. |
How Long Does it Take for Weed to Grow?
Weed plant stages will have different lengths from one cultivar to the next. Many autoflowering strains take somewhere between 10–14 weeks to go from seed to fully mature cannabis plant. Photoperiod plants often take several months, depending on how long they remain in the vegetative stage and how long flowering takes. Keep in mind that these are general ranges, and that your specific cultivar may take more or less time. After you’ve actually harvested your plants, the drying and curing processes will usually add an additional 2-4 weeks to the entire process.
If you’re cultivating outdoors, the seasons themselves will impact your timeline. Across much of the continental United States, growers typically start photoperiod plants in April or May. As daylight hours decrease in late July and August, the plants begin flowering, with harvest times often taking place between late September and October. Flowering tends to occur when the day length reaches about 14 hours. Like indoor ranges, these are general estimates; your precise location, growing setup, and cultivar will all influence how the timeline unfolds.
The Germination Stage (Days 1–7)
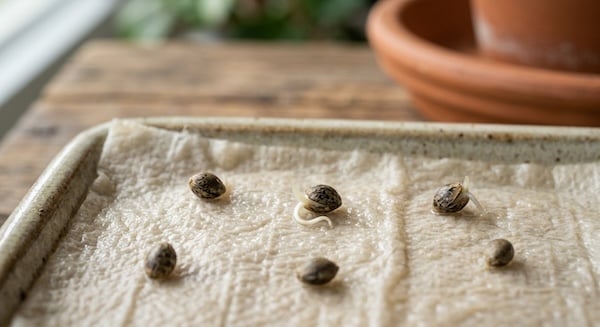
The germination process begins when you introduce a cannabis seed to water. Some growers choose to place their healthy seeds in a glass of water for about 24 hours, then keep them in between two damp paper towels in the days that follow.
As the seed absorbs moisture, its first root—called the taproot—will break through its outer shell. Once this happens, you’ll see the appearance of two rounded starter leaves, also called cotyledons.
Choosing a Germination Method
Direct-to-medium: This approach is a good choice for those who want to avoid transplanting their seeds or disturbing the roots. That said, it offers fewer visual cues, making it a little more difficult to know whether your seed has germinated or not.
Starter plugs or rockwool: This method helps manage moisture in a contained space, but can be less affordable than other options and tends to require more maintenance.
Paper towel technique: This process makes it easy to check whether your seeds have germinated, and is the same process featured in our germination guide.
Creating the right conditions
Temperatures ranging between 70–85°F (21–29°C) and relative humidity levels of 70-90% are typically a good place to start. Be sure to keep the medium damp, but not waterlogged. Darkness is actually preferred during this stage; we recommend storing your seeds in a dry, cool space such as a drawer. You also won’t need to worry about nutrients yet, as the seed itself provides its own food reserves!
Two common mistakes are overwatering, which deprives the seed of oxygen, and handling the taproot directly. The quality of your seeds matters as well. Seeds that have been protected from light, warmth, and moisture will remain viable for significantly longer than those kept out in the open.
The Seedling Stage (Weeks 1–3)
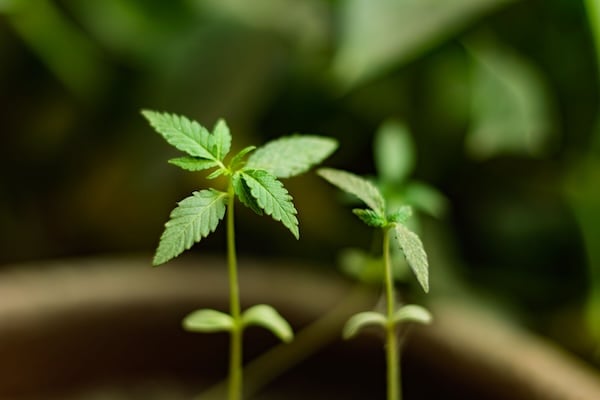
The seedling stage begins once your germinated seed has sprouted its taproot, and continues as its first true leaves develop. Unlike the cotyledon leaves we discussed in the previous section, true leaves have serrated edges. The first to emerge may contain a single blade, but as time passes, three- or even five-bladed leaves will appear.
Light Recommendations
Give your marijuana seedlings 16–18 hours of light daily. If you want to take an ultra-precise approach, aim for a photosynthetic photon flux density (PPFD) of100–300 µmol/m²/s. In short, PPFD measures the intensity of light that a plant can actually use per second across a square meter of its canopy. While the recommended ranges will differ between each stage of the growing cycle, most grow light manufacturers include a PPFD chart in the manual.
The bottom line is that too much light can damage leaves, while too little can lead to weak, stretched stems. While many growers prefer checking PPFD, there’s nothing wrong with simply observing how your plants respond to the amount of light you’re providing, and if needed, adjust accordingly.
Water and nutrients
Water your seedlings lightly, focusing closely around the plant. Because seedlings are so small, they won’t necessarily access the entirety of the soil in their container—especially if it’s on the larger side. Overwatered seedlings may look droopy, dark green, and curl downward. Underwatered seedlings may look limp and pale; their growing medium may also feel dry to the touch.
Seedlings need little to no additional nutrients initially. Around week three, consider feeding them at no more than a quarter of the strength listed on the package. Young roots are sensitive to nutrient burn, so a less-is-more approach is often the safer choice.
The Vegetative Stage (Weeks 3–16)
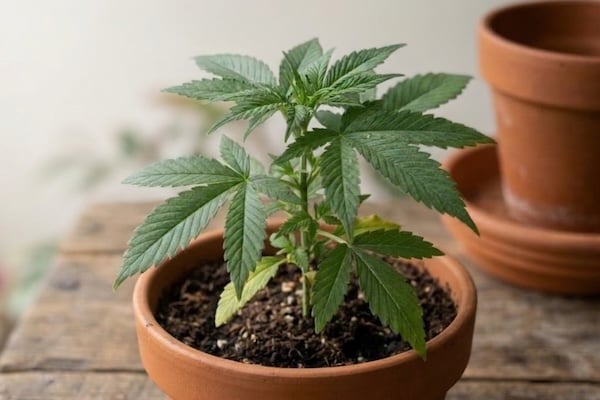
During the vegetative stage, your plants will develop significantly, building out their roots, stems, and leaves. This phase plays a large role in your final harvest weight. In other words, a cautious, thoughtful approach now can pay off later on.
Light and Nutrients
Indoor growers typically opt for around 18 hours of light and 6 hours of darkness (also known as an 18:6 lighting schedule). Others may prefer a ratio closer to 20:4.
Nitrogen (N) is especially important during the vegetative stage because it supports new leaves, stems, and roots. During flowering, a plant’s needs will shift toward increased amounts of phosphorus (P) and potassium (K). For this reason, there are specific types of nutrient mixes available, including vegetative and bloom formulas.
Training Techniques
Training during the vegetative stage can be an excellent way to protect your plants from potential challenges down the line. Some approaches are more complex and involved, while others are relatively simple and won’t stress your plants as much. When settling on a training technique, we recommend first considering your schedule, the plant’s general resilience to stress.
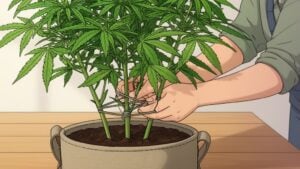
- Topping: This approach involves cutting off the main growing tip once your plant has developed 4–6 nodes (typically around weeks 4–5). Doing so redirects growth toward the side branches, encouraging the plant to develop a fuller, more horizontal structure.
- FIMing: Similar to topping, FIMing also involves pruning the newest growing tip, but doesn’t cut it off completely. The goal is to encourage several new shoots to develop from the cut area. This approach tends to be less stressful, but can also produce less predictable results than topping.
- Low-stress training (LST): This technique involves gently bending and fastening down certain stems, encouraging them to grow outward rather than straight up. Like the techniques mentioned above, this produces stronger horizontal growth. It can be an especially good choice for beginner growers, as it provides the branches with more access to light, but doesn’t actually wound the plant.
- Screen of Green (ScrOG): This strategy involves placing a horizontal screen above the plants and guiding its branches through the openings. This helps spread the canopy into a more even, flat layer, allowing light to reach more of the growing sites.
- Defoliation: This training technique is a type of pruning and involves carefully removing fan leaves that either block light from lower growth, restrict airflow through the canopy, or both. It’s usually a good idea to take a more conservative approach, as a cannabis plant’s leaves are vital for capturing light and producing energy.
Note: Autoflowers have less time to recover from high-stress techniques such as topping and FIMing. For this reason, low-stress training is often the better choice.
When to Trigger the Flowering Stage for Photoperiod Strains
With photoperiod plants, growers have control over when the vegetative stage ends. If your plants are faring well and have developed a strong structure, you can initiate flowering by switching to 12 hours of continuous light, followed by 12 hours of total darkness.
Because plants will only begin to stretch after this switch, it can be helpful to take into account their current height first. One common rule of thumb involves flipping a plant when its height reaches approximately half to two-thirds of your desired final height. That said, there isn’t a way to perfectly predict your plant’s ultimate height. Some strains may even double, triple, or quadruple in height (Boucher, 2026). For this reason, check the general height ranges for the strain you’re looking to cultivate, and make sure you leave yourself plenty of extra vertical space.
Checking for pre-flowers is another important task during the vegetative stage. These often appear around weeks 4–6 at the nodes—or where branches meet the stem. Females develop two fine white hairs called pistils; males develop round pollen sacs in clusters. While growing feminized seeds dramatically minimizes the odds of encountering a male plant, it’s still a good idea to double-check. This is because one missed male plant can pollinate an entire grow space. If you happen to see one, be sure to separate it from the remaining plants.
The Flowering Stage (Weeks 8–11)
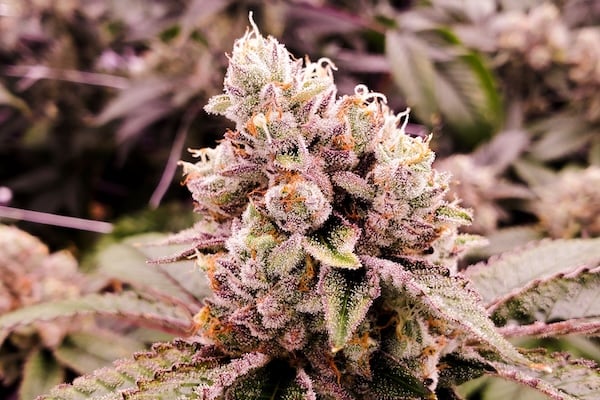
The cannabis flowering stage begins when a photoperiod plant is exposed to shorter durations of light. In practice, this typically means reducing its light from 16 hours per day to 12. The plant will interpret this reduction in light as shorter, late-summer days, and will naturally shift its focus towards developing its buds, instead of its roots, stems, and leaves.
How long is the flowering stage?
Many popular strains take approximately 8–10 weeks to develop fully mature buds. However, a plant’s genetics and growing conditions may shorten or extend this timeline. If you’re researching a specific cultivar, it can be helpful to take a look at the listed flowering time. While this won’t provide you with an exact schedule, it approximates when you’ll want to begin checking the buds for signs of maturity.
The stretch (weeks 1–3)
After the switch to a 12:12 lighting cycle, a cannabis plant will begin to grow rapidly. You’ll also see white pistils and flower sites begin to form. During this period, remember to reduce nitrogen and aim for approximately 50–55% relative humidity (RH).
Bud formation and fattening (weeks 4–6)
At this point, the buds will appear more defined and dense. The pistils will multiply, while the trichomes—the resin glands on the flower itself—will become more visible. Lower RH to approximately 45–50% and maintain plenty of airflow around the dense colas.
Ripening (Weeks 7–9+)
During this final leg of the flowering stage, you’ll see larger buds and maturing trichomes. As trichomes reach peak potency, they typically shift from clear to opaque, or cloudy. As the trichomes continue to mature and age, their heads can shift from cloudy to amber-brown (Punja et al., 2023). The pistils may also begin to darken and curl. Throughout this period, adjust RH to around 40–50% and inspect the buds using a jeweler’s loupe or other magnifying device.
Week-By-Week Flowering Guide
| Week | Buds and pistils | Trichomes | Feeding | Target RH |
| 1 | Stretch; first pistils | Few visible | Begin bloom transition | 50–55% |
| 2 | Flower sites develop | Increasing | Bloom feed | 50–55% |
| 3 | Buds become distinct | More visible | Reduce Nitrogen | 50–55% |
| 4 | Buds fill out | Resin develops | Bloom feed | 45–50% |
| 5 | Buds thicken | Increasing | Appropriate P/K | 45–50% |
| 6 | Buds continue growing | Developing | Provide bloom feed as needed | 45–50% |
| 7 | Ripening begins | Often cloudy | Consider tapering | 40–50% |
| 8 | Pistils may darken | Cloudy; some amber | Follow medium-specific guidance | 40–50% |
| 9+ | Maturity varies | Check alongside other signs | Finish feeding plan | 40–50% |
Note: These RH values are approximate growing targets, not scientifically established requirements for each individual week.
Potential Issues to Watch For
- Light leaks: Interruptions to the dark period can disrupt flowering and contribute to re-vegetation or stress-related hermaphroditic flowers. Keep the dark period uninterrupted.
- Bud rot (Botrytis cinerea): This fungus thrives when humidity and moisture persist, particularly in dense flowers. Keep RH below 50% where practical, improve airflow around colas, and inspect buds regularly. Infected flowers cannot be cured and should be removed promptly (Punja, 2021; Utah State University Extension, n.d.).
What Happens Next? Harvesting, Drying, and Curing Your Cannabis
One of the best ways to time your harvest accurately is to use a 60–100× jeweler’s loupe or pocket microscope to inspect the trichomes directly. Keep an eye out for the following key clues.
- Clear: Usually too early; cannabinoid development may still be underway.
- Cloudy or milky: Often associated with peak THC levels.
- Amber: Indicates further maturation and oxidation, which can accompany declining THC levels.
A useful starting target is typically around 70% cloudy and 20–30% amber, with few clear trichomes. While magnification is the most reliable approach, you can also watch for a large proportion (approximately 70–90%) of the pistils darkening and curling. Other signs include yellowing fan leaves and buds that have stopped increasing in size. Just remember that while these traits can be useful clues, they’re not necessarily a substitute for checking the trichomes themselves.
Drying
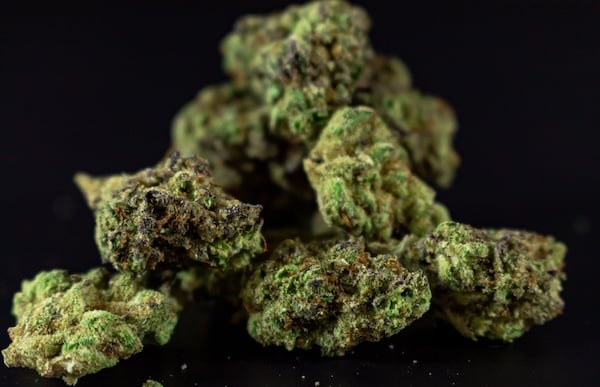
Hang your trimmed cannabis branches in a dark room at around 60°F (16°C) and 60% RH for approximately 7–14 days. Also known as the “60/60” method, this setup encourages gradual drying, although it’s not a universally established standard.
While increasing the heat may seem like a good way to speed up drying, a slower, lower-temperature approach can help preserve your plants’ aromas. Higher drying temperatures do accelerate moisture removal but can also reduce terpene retention (Das et al., 2022).
The flowers are ready for jars when their small stems snap rather than bend. Before sealing the buds inside their jars, check carefully for mold.
Curing
Once you’re ready to cure, place your dried flowers in clean, airtight jars, aiming for around 62% RH inside the jar. Open the jars daily during the first week to release excess moisture and check for musty smells. As the process continues, you can check weekly, opening briefly to ensure moisture hasn’t built up.
Curing allows moisture to redistribute through the flowers and supports changes that can improve aroma and smoking smoothness. However, it isn’t a substitute for proper drying. Sealing the flowers while they’re still wet can cause mold to develop.
Weed Stages for Autoflowers vs Photoperiod Plants
The main growing stages remain the same, regardless of whether you’re cultivating a photoperiod or autoflowering plant. What does change, however, are the lengths of certain stages—namely the flowering and vegetative phases. Because autoflowers flower based on their own pre-set clock, they tend to complete the vegetative stage much sooner than your typical photoperiod might.
Photoperiod plants won’t actually flower until there’s a specific shift in how much light they receive each day. If you’re cultivating indoors, you have complete control over when this occurs.
| Feature | Autoflowers | Photoperiods |
| Total cycle | Often 9–14 weeks from seed to harvest | Often several months, depending on veg length |
| Vegetative stage | Usually around 3–5 weeks | Grower-controlled; can be extended |
| Light schedule | Often 18/6 or 20/4 throughout | Long days in veg; typically 12/12 indoors to flower |
| Training tolerance | Best with early, gentle training | More time to recover from training |
| Yield potential | Usually smaller plants and lower yield per plant | Greater yield potential with longer veg and sufficient space |
| Best use | Short seasons, discreet plants, multiple outdoor harvests where climate allows | Larger harvests, greater control over plant size, and keeping mother plants for cloning |
What this means in practice
If you’re working with an autoflowering cultivar, early setbacks can cost valuable growing time. For that reason, it may help to plant your seeds directly in their final containers to minimize root disturbance or stall the growing process. In addition, it may help to use low-stress training.
If you’re not sure which to choose, remember that one isn’t necessarily better than the other. It’s more that photoperiods each excel at fitting different grower goals. Autos are best for those who want a more hands-off, efficient experience, while photoperiods typically appeal to those who want more flexibility over the length of the vegetative stage. This may be to provide their plants the time to bounce back from stress, or simply develop a more robust structure, resulting in higher yields.
Best Beginner Strains for Learning Weed Growth Stages
Granddaddy Purple Seeds
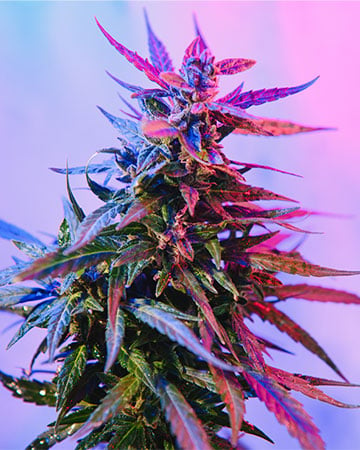
Granddaddy Purple is a great-tasting, great-smelling cannabis that will have you relaxed in no time. Easy to grow as it is tasty, this is a perfect strain to unwind with. Experience one of the most potent… Read more
- Indica
- 100% Indica
- 20% THC
Granddaddy Purple Strain: An Efficient, Pure Indica Choice
Granddaddy Purple is a beginner-friendly indica that grows well indoors and outdoors. Its relatively quick 50–60-day flowering period makes it a good fit for first-time growers, or any cultivators who prefer a more expedited timeline. This strain also responds well to low-stress training and topping, making it a useful choice for those who want to practice their pruning techniques.
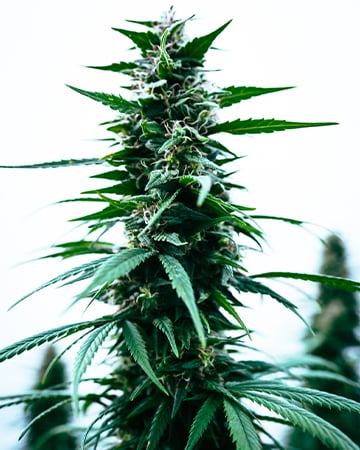
Durban Poison
Durban Poison is a 100% pure Sativa strain of cannabis that originated in Durban, South Africa. Discovered by American cannabis activist Ed Rosenthal in the late 1970s. When Ed brought the strain back to the… Read more
- Sativa
- 100% Sativa
- 20% THC
Durban Poison Strain: A High-Energy Pure Sativa
Durban Poison is a pure sativa known for its tall, slender structure and potent THC content of 20%. A relatively forgiving cultivar, it’s an especially good pick for beginners who want to try out a sativa. Durban Poison seeds’ 60–70-day flowering period isn’t especially fast, but provides new cultivators with the chance to slowly observe the bloom phase unfold. Happy, energetic, and creative, it’s a time-tested classic that continues to charm fans with its earthy, pine-like scent.
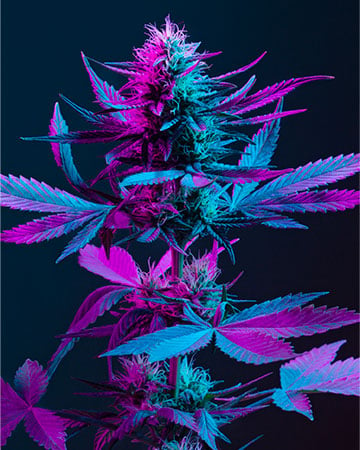
Purple Haze
One of the most popular strains the world has ever seen is Purple Haze. It gets its name and mind bending effects from its parent strains Purple Thai and Haze. With its tasty flavor profile,… Read more
- Sativa Dominant
- 30% Indica, 70% Sativa
- 19% THC
Purple Haze Strain: A Spicy, Sweet Wake-and-Bake
Purple Haze is a beginner-friendly, sativa-dominant strain that adapts well to indoor and outdoor environments. Its 70% sativa lineage and 19% THC levels offer an intriguing blend of mental pep and psychoactive effects. This cultivar responds well to pruning, good air circulation, and plenty of light. As such, Purple Haze seeds are an excellent choice for those looking to practice canopy management.
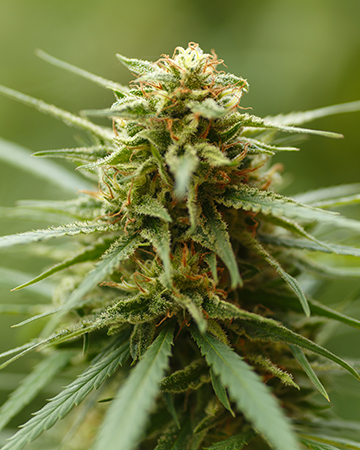
Runtz Auto
The Runtz strain is tart, sweet, and energizing, this cannabis strain first emerged in California in 2020 before becoming internationally popular. With delicious and world-famous dessert strains, Zkittlez and Gelato, as its parents, as well… Read more
- Indica Dominant
- 10% Ruderalis, 40% Sativa, 50% Indica
- 27% THC
Runtz Strain: A Candy-Flavored Auto
Runtz Auto is an easy-to-grow autoflowering cultivar with a relatively short flowering period of 50–60 days. A classic beginner choice, it requires less maintenance than your typical photoperiod strain, flowering entirely on its own in a relatively brief timeframe.
Runtz Auto seeds can be a great introduction to auto strains, as they provide beginners with the chance to keep up with a more expedited timeframe. This cultivar is also a major hit with those who prefer a balanced mixture of indica and sativa effects, or an exceptionally strong THC content.
A Few Closing Thoughts
Cannabis plants follow a predictable series of growth stages, and approaching each carefully is one of the best ways to avoid common challenges before they occur and inspire your plants to reach their full potential.
While the above guide covers some good rules of thumb, the length of each growing stage—and its requirements—will vary from one cultivar to the next. For this reason, choosing seeds that suit your growing goals is a good place to begin. If you’d like to explore some options, we recommend taking a look at our feminized and autoflowering selections. Good luck!
FAQs
A strain’s genetics and its growing environment both factor into a harvest’s final weight. High-yielding strains tend to produce vigorous early growth, strong branches, and have a knack for absorbing light more efficiently.
An ample harvest will also depend upon proper lighting, the right nutrient formula, and consistent watering. Even the highest-yielding strain can produce modest yields if it becomes too stressed. However, addressing any growing challenges early in the vegetative stage is the best way to sidestep larger hurdles later on. The strains outlined above simply have a higher maximum potential—but proper care is what will allow them to truly reach that ceiling.
During the end of the vegetative stage, begin to look for pre-flowers. These plant structures will be present at the plants’ nodes—or where the branches meet the stem. Female plants will develop two fine white hairs called pistils, while males form round pollen sacs. These signs often appear around weeks 4–6. Feminized seeds greatly reduce the chance of growing male plants. Remove unwanted males promptly, before their pollen sacs open.
Female cannabis plants pass through four main stages: germination, seedling, vegetative growth, and flowering. However, many growers factor a fifth stage into their overall timeline. This phase involves harvesting, drying, and curing the buds.
Flowering typically lasts around 8–11 weeks, although some sativa-leaning strains may take 10–14 weeks or longer. Indica-leaning strains often flower more quickly. If you’re thinking about cultivating one strain in particular, its description will provide a more accurate flowering time estimate.
In some cases, yes. Cotyledons (the first rounded leaves) indicate the earliest seedling stage; serrated true leaves and developing nodes indicate seedling or vegetative growth. White pistils suggest a female plant entering flowering, while developing buds and increasingly cloudy trichomes indicate later flowering and ripening. A clear photo can help narrow down the stage, though a photo alone may not establish exact age or harvest readiness.
References
Boucher, C. (2026, July 2). Flowering. Gardening at USask. https://gardening.usask.ca/articles-and-lists/articles-cannabis/articles-growth-cycle/flowering.php
Das, P. C., Vista, A. R., Tabil, L. G., & Baik, O.-D. (2022). Postharvest operations of cannabis and their effect on cannabinoid content: A review. Bioengineering, 9(8), Article 364. https://doi.org/10.3390/bioengineering9080364
Punja, Z. K. (2021). Emerging diseases of Cannabis sativa and sustainable management. Pest Management Science, 77(9), 3857–3870. https://doi.org/10.1002/ps.6307
Punja, Z. K., Sutton, D. B., & Kim, T. (2023). Glandular trichome development, morphology, and maturation are influenced by plant age and genotype in high THC-containing cannabis (*Cannabis sativa* L.) inflorescences. *Journal of Cannabis Research, 5*, Article 12. https://doi.org/10.1186/s42238-023-00178-9
Utah State University Extension. (n.d.). Bud rot. https://extension.usu.edu/planthealth/ipm/notes_ag/hemp-bud-rot